Monday, July 13, 2009

Titilating Tuesdays - Ghetto Tubeless Conversion

Alright, here it is. The moment you've all been waiting for. Cheap, effective, awesome TUBELESS mountain bike tires, using the wheels are tires you already own.

Let's start with sealant. You can either buy sealant (Stan's NoTubes makes good stuff), or you can make your own for about 1/10th the cost. Go to a hardware store and buy some latex additive, or an art store and buy some liquid latex. Either will work.

For homemade sealant, mid together:
  • 4 parts latex
  • 1 part windshield wiper fluid (lasts longer than water, doesn't freeze in winter)
  • A bunch of glitter (weird, I know. It fills bigger holes really well)

Making your rims air tight is the next challenge. You will need the following materials and tools to finish the job:
  • 1 roll electrical tape
  • 1 roll 3m filament tape, in a width that will fit in your rim
  • scissors
  • Air compressor or CO2 cartridges, Flash-esque pumping skills.
  • an old tube with a threaded valve. Best option is something with a removable valve core for adding more sealant later. Don't use road tubes, the rubber is too thin and won't create a good seal. Make sure you have the little nut that threads onto the valve.

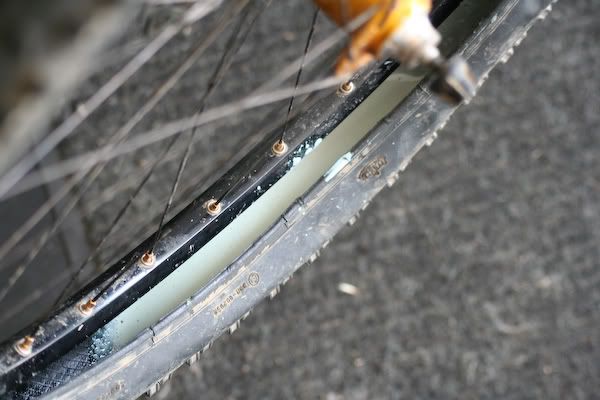
Start by removing whatever rim strip you have, and clean the inside if your rim thoroughly. Next, begin wrapping the filament tape around the inside of the rim, starting near the valve hole. The number of times you go around depends on the depth of your rim. A deeper rim needs more tape. Usually, 3-5 times around is good. You want to raise the bed of the rim up so that the tire beads sit closer to the bead hooks of the rim, making inflation much easier. If you look at the NoTubes rim strips, they raise the rim bed up quite a bit. You want to do the same thing with the tape.

Once you have a bunch of filament tape on the rim bed, switch to the electrical tape. Go around the rim twice, trying to cover all of the filament tape. This is to a provide a smooth rim bed, and to protect the filament tape from the sealant.


Poke out the valve hole. Don't bother opening it up very much, just enough for the valve to get through.


Take your flat tube and cut the valve out. The piece of rubber attached to the end of the valve should be about the size of a nickel.

Stick the valve into the rim about half way, so that the rubber on the end is NOT sitting in the rim bed. You need to be able to fit the rim beads in between the valve rubber and the rim.


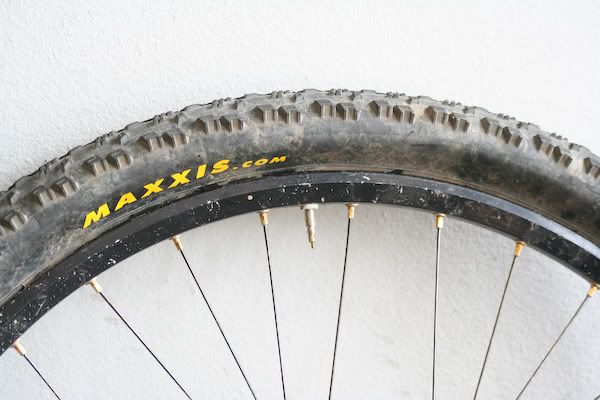
Grab your preferred tire. The tire can tubeless ready or just a standard tire. Tubeless tires will mount up much easier, but they are heavier. Standard tires often take a bit of coaxing, and sometimes (rarely) won't work at all. A tire that has been mounted before will air up much easier than a brand new tire, because new tires usually still have creases in the bead from being folded. These creases let a lot of air out. So, if you can, mount up a new tire with a tube for a few days before trying to make it tubeless.

Mount up one bead of the tire. Make sure the bead sits in between the rim and the valve rubber. Remember, the valve shouldn't be pushed all the way in yet.

Begin mounting the second bead, starting at the valve. Again, put the bead in between the valve rubber and the rim. Work your way around the bead, but leave a bit open at the bottom so you can pour the sealant in.


Pull the valve all the way down, put the nut on and tighten as much as you can by hand. Then take some pliers and tighten until the pliers start to slip on the nut. Very tight. You have to press the valve rubber into the valve hole of the rim.


Grab your bottle of sealant, and shake vigorously. You have to get the latex all spread around.

Pour the sealant into the tire. 1 cup is enough for more tires. More for bigger tires, less for smaller ones. More for thin tires, less for tubeless-specific tires. Spin the tire so that the part of the bead that is not mounted is at the top, then finish pushing the bead on.

Grab the wheel by the hub and spin, shaking up and down. Try to get the sealant all over the inside of the tire. Some may dribble out the sides - that's fine.

Use an air compressor or CO2 cartridge to inflate the tire. Air compressors work well and are cheaper, but you may need the quick blast of air from a CO2 to get the tire to air up.

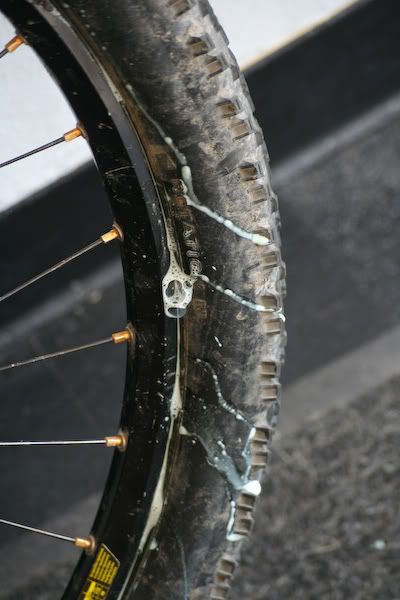
Once you get some air in the tire, and it seems to be staying, grab the wheel by the hub again and spin and shake. There may be bubbles and ooze coming out the sidewalls - try to get the sealant to hit all these points until they stop bubbling and oozing. Grab your pump, and reinflate to 35-40psi. Lay the wheel on its side (the top of a trashcan or bucket works well for getting it level) and leave it there for a few minutes, then flip it over. Repeat until oozing stops.

Go for a quick ride around the block, bouncing up and down as much as you can. Again, you want to the sealant to fill up all the tiny holes in the tire.

You're DONE! The tire may deflate the first night or two - just pump it up before even touching it. If you accidentally push the bead off the rim, you'll have to use the compressor again. Sad day, that.

Mediocre Monday - Tubeless Tires!

When it comes to flats, I'm kind of a cranky guy. I fix enough of them here at the shop that I really, really don't want to deal with them out on the trails. I don't have much patience for buddy's flats either, mostly because of three fantastic developments in mountain bike technology - tubeless tires, rims, and tire sealant. I'm pretty close to refusing to ride with people who do not take advantage of some form of tubeless tire technology.

Running tubeless tires with sealant virtually eliminates flats. Pinch flats disappear, because there is nothing to pinch. Punctures are magically cured within one rotation of the wheel. The only real way to flat a tubeless tire is to cut the sidewall enough that the sealant can't fill up the hole; an extremely unlikely circumstance if you chose your tires correctly and try not to run the sides of your wheels into rocks (probably a good idea anyway).

On top of virtually eliminating flats, tubeless tires allow you to run lower tire pressures (because you can't pinch flat), which increases traction, adds some comfort, and actually decreases rolling resistance over rough terrain. Ballah!

However, there are a few problems with standard tubeless setups - using both tires and rims designed to be used without tubes. The first is weight. Tubeless tires tend to weigh as much as a normal tire and tube combined, tubeless rims tend to weigh more than standard rims, and the use of sealant adds even more mass. The second is cost. Tubeless tires are more expensive, sealant is expensive, and buying a tubeless wheelset that doesn't weigh as much as the rest of your bike is very expensive.

But, do not despair! The great minds here at Velox Cycles (and lots of other people on the Internet) have devised a solution to these problems! After a few years of R&D on my own bike and the bikes of a couple friends, I've developed a "ghetto tubeless" system that allows any rider to take their existing wheels and tires, tubeless ready or not, and run them without tubes for about $10. Similar systems can be found in message boards all over the Internet, but a lot of trial and error has led me to a number of small tricks that make a successful tubeless conversion much easier to attain.

Sadly, you'll have to wait until tomorrow to find out exactly how to do it. Don't pout, you've waited your whole life for this moment, what's another 24 hours?

Tuesday, June 30, 2009

Titilating Tuesdays - SKS Commuter Fenders

Titillating Tuesdays shall be a regular installment of the Velox Cycles blog. To titillate, for those of you still caught up on the first three letters, is to excite or stimulate. What could be more exciting and stimulating than rad bicycle bits? Every Tuesday we'll pull out our soapbox and harp about a cool product, mechanical trick, trail, ride, or just about anything else bike-related that we think you should know about.

This week, we're spotlighting the SKS Commuter Fender set. They're made in Germany, and like most fenders these days are essentially a thin aluminum skeleton covered in plastic (polycarbonate). They claim to be unbreakable, but we're pretty sure a hammer would do the job. Under normal riding circumstances, however, you are not likely to break these suckers. Mounting hardware is sturdy with double stainless steel stays attached to the fender body with big, healthy looking rivets. They come in three different widths - fixie/road bike sized at 35mm wide, commuter/hybrid sized at 45mm, and mountain bike sized at 60mm. The smallest size is perfect for those who never run anything bigger than a 28c tire, medium great for 28c-40c, and large for anything up to a 2.3" mtb tire.

In terms of water-stopping performance, any decent fender set will do the job. The SKS Commuters fall into this rather boring and very wide category. They fall low enough up front to protect your feet, and wrap all the way around out back to prevent that oh-so-attractive ass smudge, as well as keeping the spray headed backwards towards your riding buddy to a minimum. Set them up so they sit close to your tires, without rubbing, and the only water you'll be feeling will be coming from the sky, not the road. That's the point, right?

It's this mounting hardware that set off our love affair with SKS fenders. In the amount of time it takes you to put on your hipster jeans in the morning (5-7 minutes, depending on how stretchy they are) you can mount up these fenders perfectly. They come with an allen key that is used to adjust the height of all stays - just loosen up the bolt and slide the fender wherever you like. Clamp the bolt back down and voila, your fenders are ready to rock and roll. They'll stay that way too - I haven't had to adjust the stays on mine in over a year.

We're of the opinion that any dedicated commuter should have fenders on their bike, even in Colorado. They add so little weight, so little wind resistance, and so much function that riding without them is just silly. Save your pants from the humiliation of the ass smudge - get some fenders.

Wednesday, June 24, 2009

The Velox Cycles Manifesto

Velox Cycles isn't a corporate bike shop. In fact, we're about as un-corporate as it gets. We don't have rows and rows of thousand dollar bikes, an entire wall dedicated to wheels that cost as much as a used car, flat screen TV's playing gnar-core mountain bike DVD's, or anything resembling a sales person. Our names are Brian and Caley, and we're the two mechanics. We're also the sales people. And the marketing department. Shipping and receiving too. Oh, and the janitorial squad. Multi-talented, you might say. Brian fixes cars and flies planes, and used to work on an ambulance. He has a three-legged dog named Cody. Caley is a pro mountain biker turned roadie, who just turned 21 but has been a mechanic for 8 years. We almost always know what we're talking about, but if we don't, we'll tell you. Or we'll make something up, just to see if you get the joke.

We believe that a bike shop should be a space to sit, drink a beer, and chat about all things pedal powered. Work on your own bike, bring your own music (yeah, we'll play it. Then mock you if it sucks), and learn from us as we learn about you.

We're the kind of shop that knows your bike's name but might forget yours. That's not our fault, really, because people all look pretty much the same but bikes rarely do. That weird eyebrow thing you have going on is a lot less noticeable to us than the '65 Bendix two speed hub you want rebuilt. Those things were cool. Your eyebrow, not so much.

If you want a shop that will carefully explain to you which bike you want based on the first two sentences out of your mouth (its this one, with the $2000 price tag), don't come to us. But if you want to come and talk about the things you look for in a bike, or how to turn your POS into the ride you've always known it could be, we're a good bet.

Bike shop customers are people. We’re people. We, the people, pledge to treat you, the person, like more than just a walking wallet. That is our promise.

The Shop

Photos from the shop: